
Welcome to my travelogue series, in which I share my travel diary the old-fashioned way, recounting where I went, what I did, what I ate, how much I paid, what I felt, etc, in a sequential order.
I have traveled to Yogyakarta once before, in 2009, when I had just graduated from the university. Back then, our (my friend and I) main goal was to visit the Borobudur, and we accomplished that. But we didn’t venture to other temples.
This year, in Dec 2022, my hubby and I decided to go on a spontaneous trip to Yogyakarta. You may ask, why Yogyakarta? That’s because it is home to 2 UNESCO World Heritage Site: Borobudur and Prambanan.
And why spontaneous? Because it was an urgent trip to pay last respect to my uncle in law in Jakarta. We spent 1.5 days in Jakarta. From Jakarta, we then took domestic flight to Yogyakarta.
Because we made all the bookings 1 day before our flight, we didn’t have enough time to plan a proper trip. As a result, we ended up paying more for certain things, and we had to scramble to find car rental in Yogyakarta. I’ll talk more about them further in this article.
I just want to emphasize that this itinerary is not the best itinerary, but it’s a real itinerary that we use during our trip to Yogyakarta in December 2022. Feel free to learn from our mistakes and create a better itinerary for your trip =)
Now, let me start with a summary of the itinerary, followed by travel cost incurred per person. Then, I’ll walk you through each day on what we did and how we did it.
Overview of Itinerary
Day 0: Fly in at YIA Airport – Hotel
Day 1: Hotel – Prambanan – HeHa – Ayam Goreng Tojoyo – Hotel
Day 2: Hotel – Borobudur – Merapi – Ayam Goreng Suharti – Hotel
Day 3: Hotel – Kraton – Hartono Mall – Airport Train – Airport Hotel
Day 4: Airport Hotel – Fly Out from YIA Airport
Travel Cost Per Person
- Flight = SGD 154.74
- SGD 61.63 for CGK-YIA on Citilink
- SGD 93.11 for YIA-SIN on AirAsia
- Accommodation = SGD 91.73
- SGD 60.27 for 1 night at Harper Malioboro, to be divided by 2
- SGD 82.74 for 2 nights at Atrium Hotel, to be divided by 2
- SGD 40.45 for 1 night at Cordia Hotel YIA, to be divided by 2
- SIM Card = SGD 9.2
- SGD 5 for Singtel ReadyRoam 1G, to be divided by 2
- SGD 13.4 for Telkomsel Prepaid SIM, to be divided by 2
- Transportation = SGD 79.39
- SGD 115.56 for 2-day Car Rental + Petrol + Tips, to be divided by 2
- SGD 39.62 for Grab/Gojek, to be divided by 2
- SGD 3.6 for Airport Train, to be divided by 2
- Food = SGD 94.2
- Activities = SGD 89.4
Total Travel Cost Per Person = SGD 518.66
Planning for the Trip
As I mentioned previously, we did very minimum planning because of the lack of time. All we did before departure were: booking return flight and booking the hotels. We didn’t have time to look for car rental and to do any itinerary planning before departure.
Our visit coincided with the weekend of Jokowi’s third son’s wedding. So, most hotels were quite overpriced. We had wanted to book Phoenix hotel but the price was too high in our opinion. As a result, we ended up with 1 day at Harper Malioboro (because it’s near Tugu, and we planned to take train from airport to Tugu when we arrived at Yogyakarta), 2 days at Atrium Hotel (because it’s an affordable 4-star hotel) and 1 day at Cordia (because we have an early flight home to catch).
The 2 days at Atrium Hotel was the worst decision we made. Sure the exterior looked amazing, but the interior was horrible. So horrible that I decided it’s not worth my time to write a dedicated article to review the hotel. Please avoid Atrium Hotel at all cost. I’ll talk more about this hotel in Day 1 and Day 2.
Day 0
I call this Day 0 because we arrived at Yogyakarta at night and didn’t have chance to do anything other than check-in to hotel, have dinner and sleep.
Our flight from Jakarta got delayed so when we arrived at Yogyakarta International Airport, there was only 1 train left to the city. When we reached the airport train station, about 1 hour before the scheduled departure of last train, we were shocked that the tickets have been sold out! Gosh.

The remaining options to get to the city were: take a Grab/Gojek, take a taxi, or take a private transfer from one of those guys loitering outside the Arrival. We compared prices between Grab and Gojek; and Gojek’s price was cheaper so we went with that. It cost us IDR 269k and the ride took about over 1 hour.
After checking in to our hotel at Harper Malioboro (you can read my review here), we settled down, unpacked and prepared to go out to look for food. However, it was raining heavily! We could either take a Grab/Gojek to a restaurant or we could order GoFood/GrabFood. We decided to get the latter.

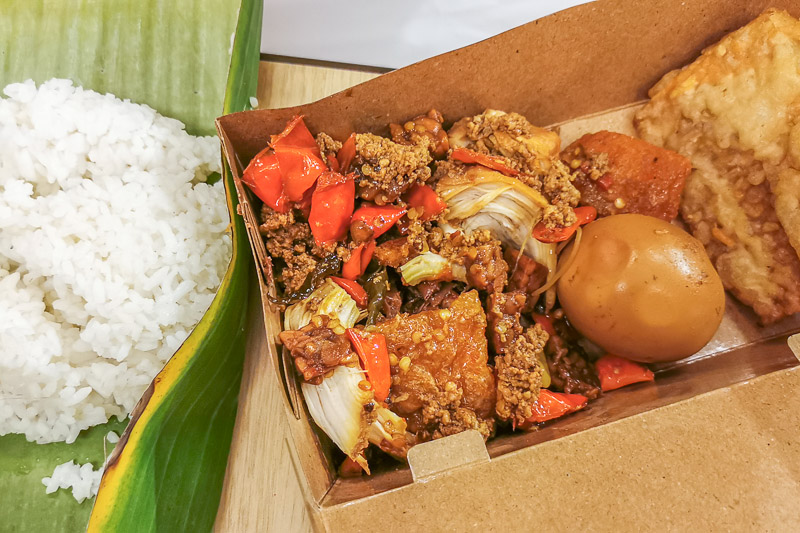
We ordered Gudeg Mercon Mbak Yuni via GoFood. I chose this because this stall sells savory gudeg, not the sweet type that most stalls sell. It cost us IDR 60k for 2 gudeg including delivery fee, after applying discount voucher. Quite cheap! And the taste is quite good!


Rain also means that we can’t go out to get groceries. So, GoMart it is! We ordered some snacks and drinks and got it delivered to our hotel. We had to go down to collect the items. I really love the convenience of getting food and groceries delivered in Indonesia!
It was a tiring day of travel and we slept early, totally forgotten that we had not arranged for any car rental yet!
Day 1
Day 1 started with breakfast at hotel. It was a pretty satisfying breakfast in my opinion, totally recommend getting the breakfast if you’re staying at Harper Malioboro.


Then reality hit! We realized we had not booked a car rental yet! All the online car rental requires at least 12 hours advance booking, and it’s too late for us to look do online booking. We searched GoogleMap and found a car rental near our hotel. So we gave them a call and we went to their place shortly after that.
Apparently, in Yogyakarta, it’s quite troublesome to rent a car without driver. They want to add you as a friend on facebook or instagram. And they want to know your life history (incl. where you are from, what you do for living, what your hobbies are, etc)! They interrogated us for half an hour and still convinced that we were going to steal their car.
They offered to rent us the car with a driver. It’s more expensive than renting one without driver, but they said the driver is a tour guide and knows a lot of interesting places that’s worth visiting.
Tired with the interrogating and feeling like they wasted our time, we relented and agreed to rent a car with driver. They charged us IDR 1m for 2-day car rental with driver, excluding fuel (estimated to be IDR 100k/day), attraction tickets, and parking. The car was a Mitsubishi Xpander which was still new and clean, so we didn’t feel like getting ripped off.
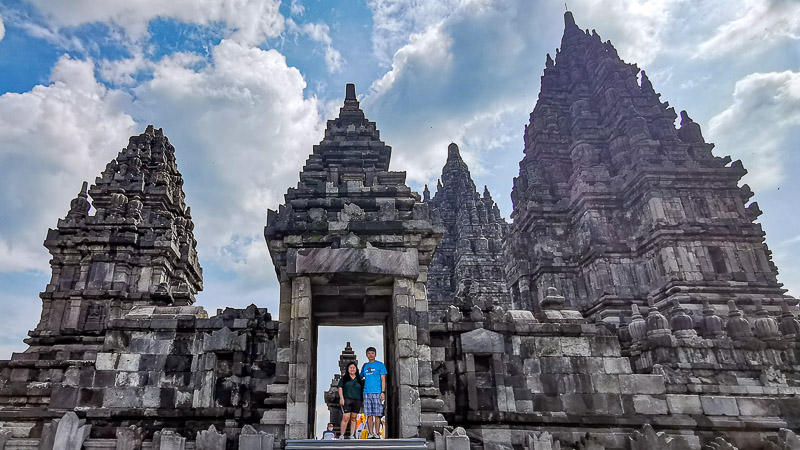
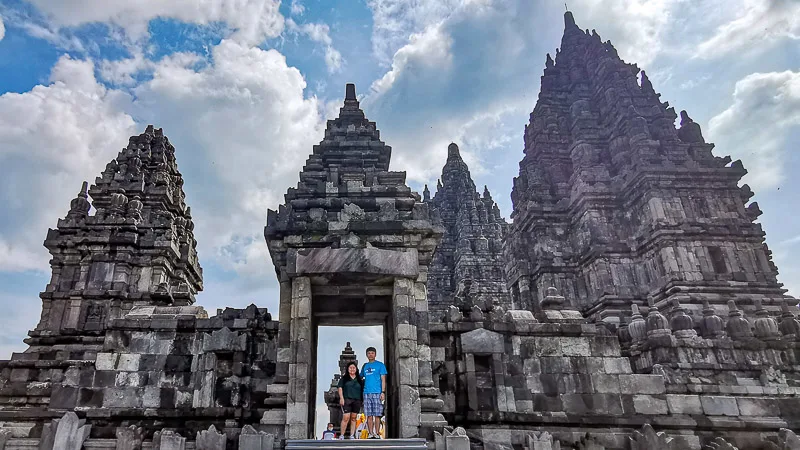
Then, we checked-out from the hotel, loaded our luggage to the car and went for sightseeing. Our first stop of the day was Candi Prambanan.

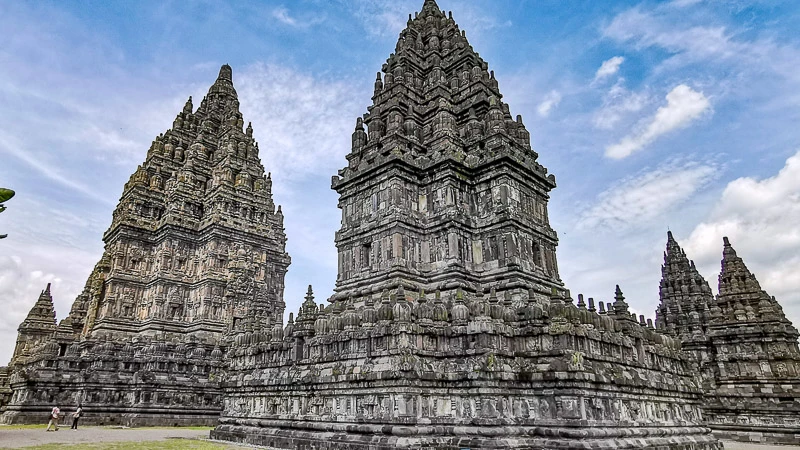
True enough, the driver acted as our guide and walked with us throughout the entire Prambanan compound. And he takes really good photos!! We’re so grateful that he was our driver and guide. You can read my article about Prambanan here (it includes the nice photos our driver took for us too!).
At the end of our visit at Prambanan, we took a rest at one of the food stalls near the exit gate. I couldn’t resist not ordering Indomie and coconut. After eating about 30% of the soupy Indomie, I found a fly inside the soup hidden under the noodle!!! It was already motionless, I guess it got cooked together with the noodle?! I stopped eating the noodle right away. Thankfully I didn’t have an upset stomach in the following days.
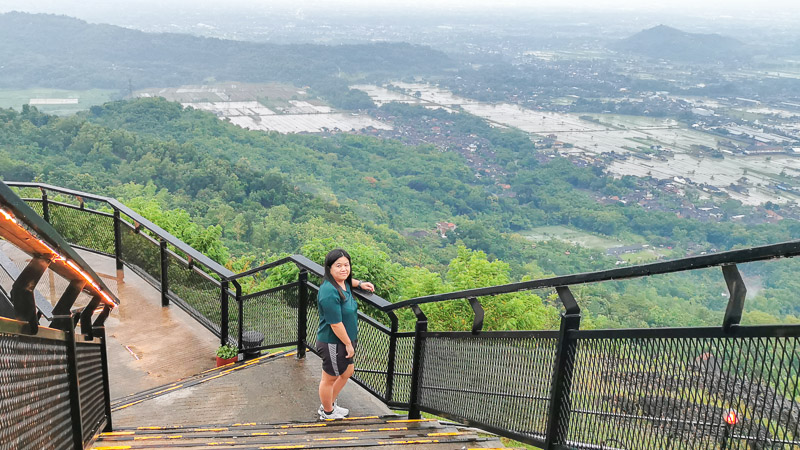
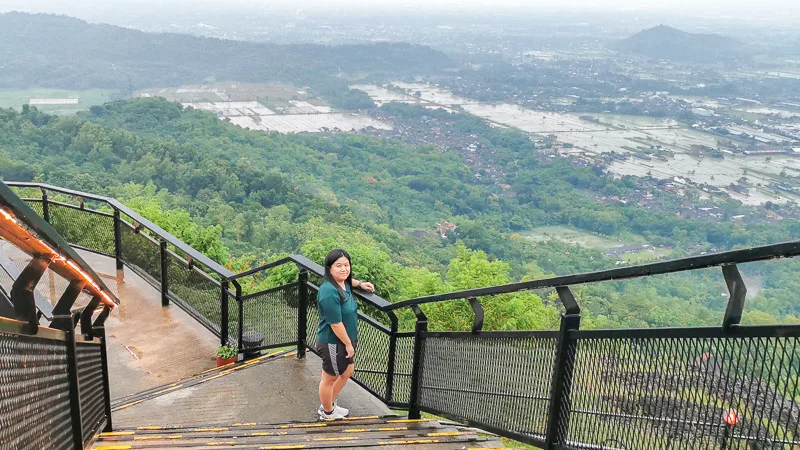
For the next destination, our driver recommended a few places, including Ratu Boko, Obelix Hills, HeHa Sky View, HeHa Ocean View. We decided to go to HeHa Sky View and skip Raku Boko because we were quite tired from exploring Prambanan (this turned out to be a mistake, I wish I decided Raku Boko instead).
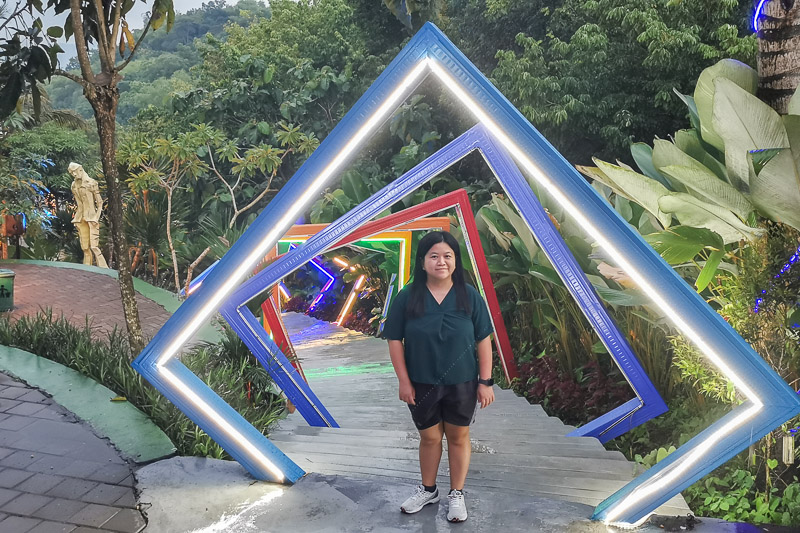
HeHa Sky View is a viewpoint at Gunungkidul (Mount Kidul) that gives a sweeping view of its surrounding lowlands. Ticket costs IDR 20k per person. There are restaurants, cafes and food stalls for visitors to grab some food and drinks.
Bluntly speaking, I personally feel that HeHa is a very commercialized attraction, which is probably built for Instagram. There are many Instagram props (eg: hot air balloon, glass floor, aeroplane) all around the compound and you NEED TO PAY to take photos with most of the props! I wasn’t willing to pay for a photo with such props, I’m content to take photos on the walkway.
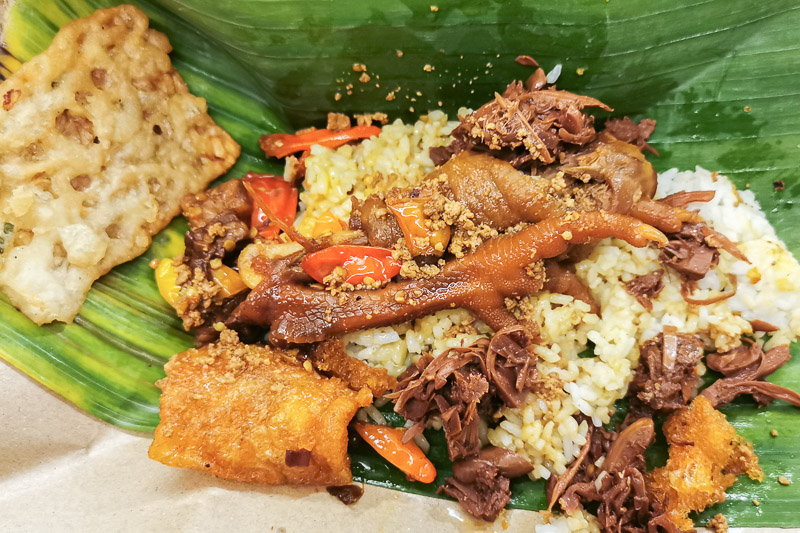
Next, we went back to Yogyakarta to have our dinner. Having no idea what to eat in Jogja beside gudeg, we asked our driver for recommendation. He highly recommended Ayam Goreng Tojoyo. To be honest, I was quite skeptical that a simple fried chicken can make a great meal.
Well, it turned out I was wrong. The fried chicken was really good! We paid IDR 124k for 4 chicken breasts (each of us eat 2pcs cos it’s quite small), 2 rice, fried tofu and 2 drinks. It’s not cheap in Indonesia’s standard but it’s oh so worth it!

Finally we went to our next hotel, Atrium Hotel, to check-in. The check-in process was smooth. Even though the exterior of the hotel looks great, the interior of the rooms isn’t exactly good. It felt like the room hasn’t been properly cleaned in years. The bathroom wall has stains. The bedsheet has stains. There were dusts everywhere.
We tried to close an eye. BUT, the straw that broke the camel’s back was the small cockroach that roamed around the bathroom when I was taking my shower. GASP! I quickly finished my shower and called the receptionist to complain about cockroach and bedsheet stain and asked for a change of room.
The receptionist and his manager were quite accommodating. They told us that they only had 2 rooms left on the ground floor, and they let us have a preview of the rooms and choose the room that we wanted. They promised they would give us better room with a good view on our second day.
The replacement room also had stains on the bedsheet so we asked them to change. The new bedsheet also had stains, but we just closed one eye. I guess the stained bedsheet is a persistent problem in hotels in Yogyakarta.

Day 2
Our Day 2 started with breakfast at Atrium Hotel. It was not a breakfast to remember. It was a breakfast good enough to fill our hungry tummy. I didn’t even bother to take photos of the food.
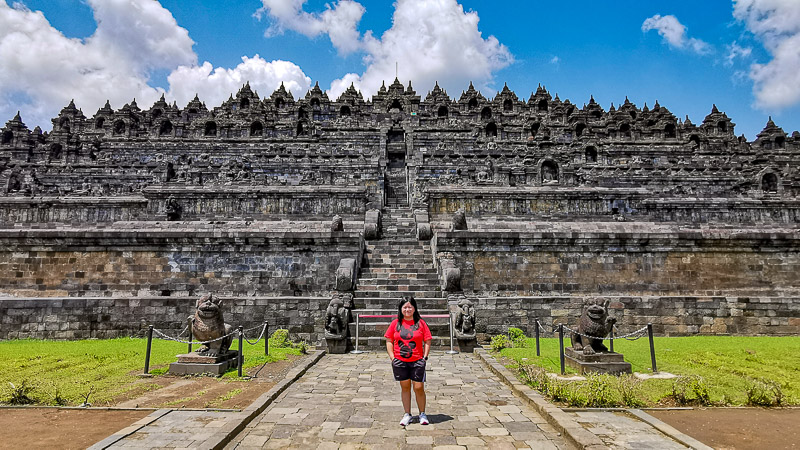
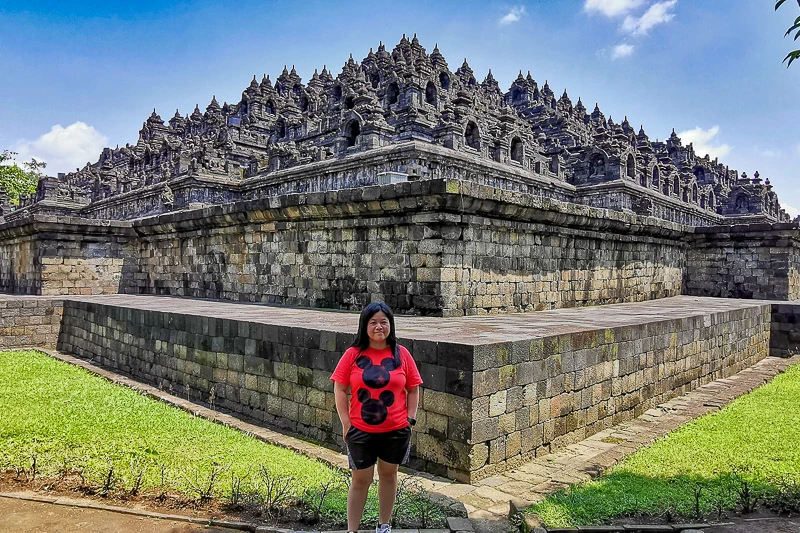
We started our sightseeing at 9am. Our first stop was Borobudur. Our driver is a different person from the day before. The previous driver had an appointment so he couldn’t drive us today. This second driver isn’t exactly a tour guide, he let us explored Borobudur ourselves. The journey from Atrium Hotel to Borobudur was about 1 hour.
We were so disappointed that visitors are currently not allowed to go up to the top of Borobudur temple where the photogenic stupas are located at. The main reason of our trip to Yogyakarta was to climb up Borobudur Temple and be awed by the stunning views and vibes. I wanted my hubby to experience what I felt when I climbed Borobudur in 2009, unfortunately it wasn’t happening on this trip.
Anyway, since we were already there, we tried to make the best of our time. We took plenty of photos at the temple yard and visited the museum. You can read my article about Borobudur here.


Next, we went to Dapoer Gending to have lunch. It’s a humble food stall that sells cheap food. We had 1 Ayam Penyet (IDR 15k) and 1 Nasi Goreng (IDR 15k). There were so many flying insects (which looked like bees) in the stall but luckily they didn’t attack us.
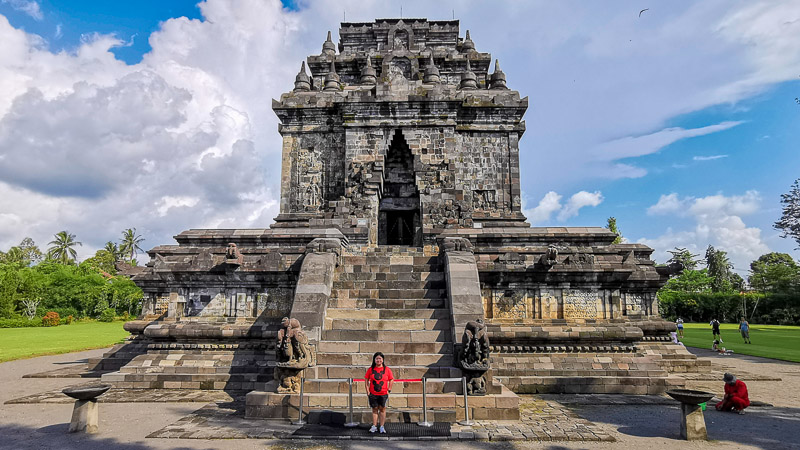
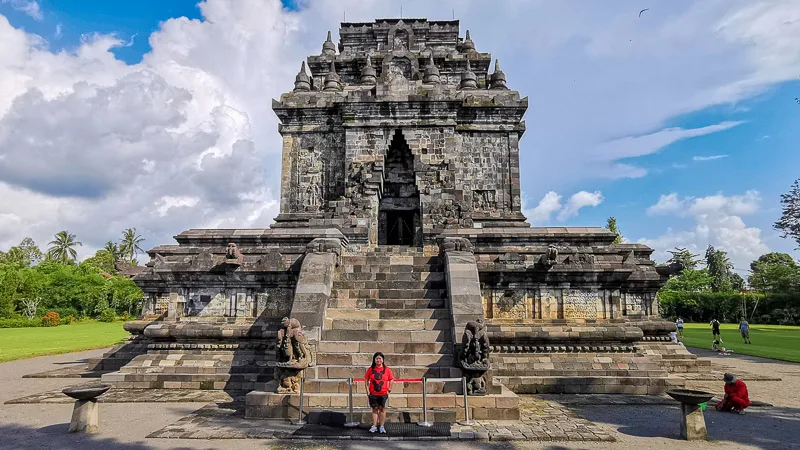
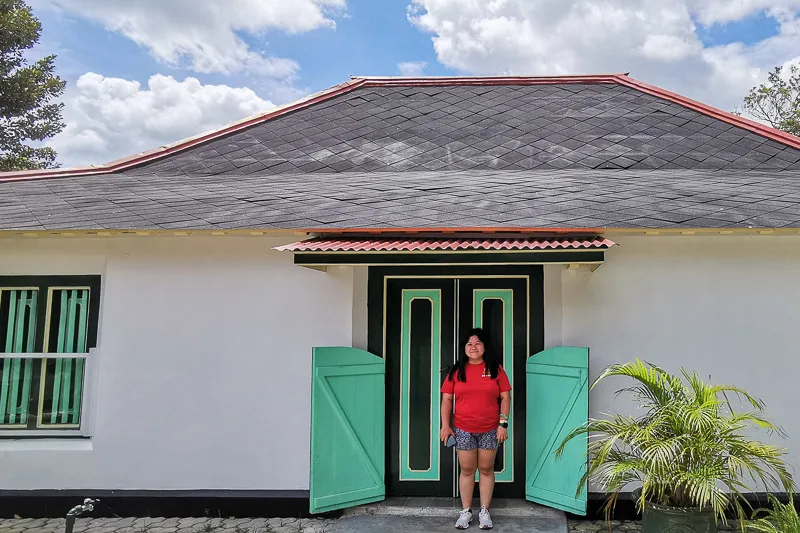
After lunch, we went to Candi Mendut, a small temple 10-min drive from Borobudur, which was recommended by our driver. It has a monastery and a temple. The monastery is free of charge, and for the temple, we paid IDR 20k per person.
It was a quiet temple, there were not many visitors during our visit. It gave us ample opportunities to get nice photos of the temple. I actually think Mendut is a hidden gem and I recommend you to visit it if you’re going to Yogyakarta. You can read my article about Mendut here.
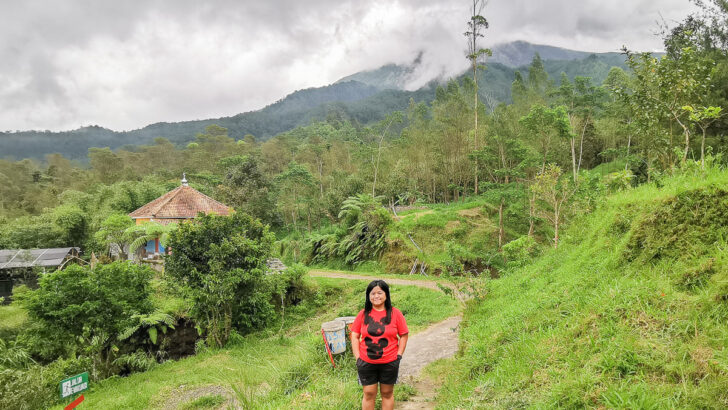
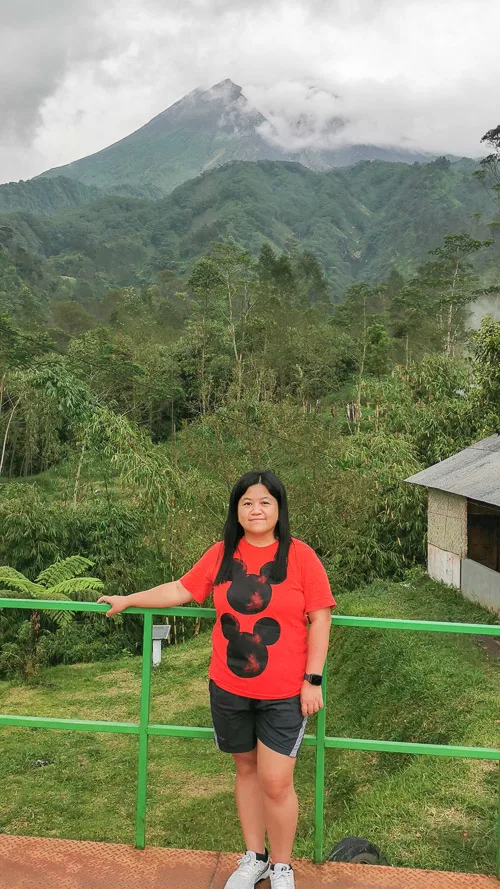
Our next destination was Mount Merapi. The driver drove us to a viewpoint that’s supposed to give us a nice view of Merapi. However, it was already 4pm+ when we reached there and the mount was covered by thick clouds. It’s actually recommended to visit Merapi early in the morning when the sky is bright.
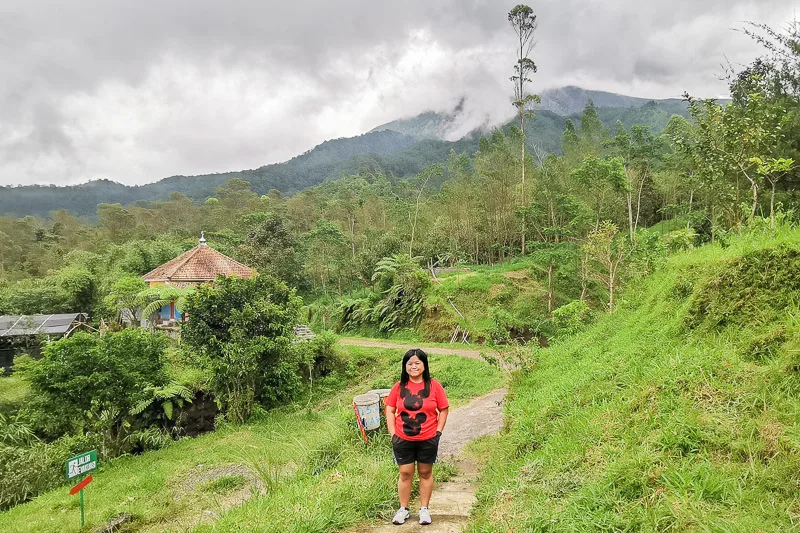
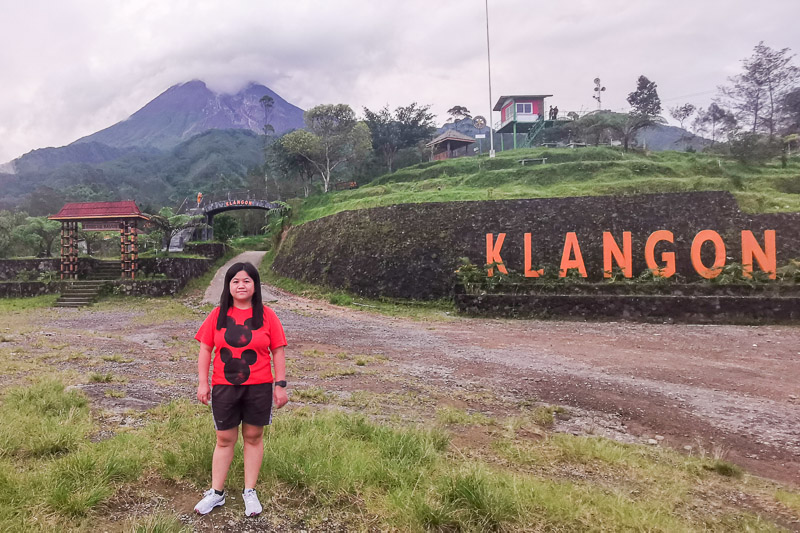
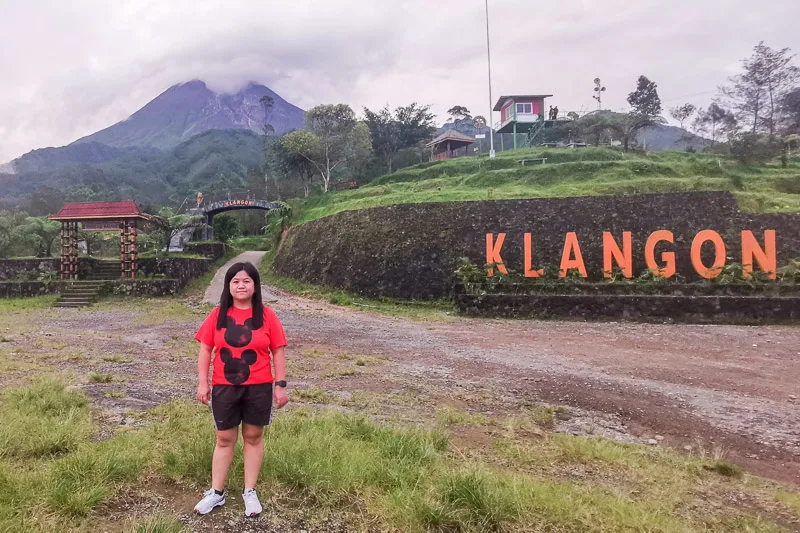
Feeling defeated but not wanting to give up, I searched through Google Map and noticed that GMap recommended Bukit Klangon by giving it a big special icon. Our driver has never heard about it and had no idea how to go. After asking around and listened to GMap instruction, we finally made it to Bukit Klangon at 5pm!
Going to Bukit Klangon was a great decision. It was quite close to Merapi and there’s no admission fee. it wasn’t exactly a tourist attraction, though there were some photo props. We spotted youth people setting up camping tents there.
We were so lucky that the clouds cleared for a while and we managed to have a peek of Mount Merapi’s summit! I think it’s a nice alternative place to see Mount Merapi.


Satisfied with seeing Merapi, it was time to head back to Yogyakarta City. We went to a souvenir shop to buy bakpia. Our driver recommended Bakpia Pathok 25, which is one of the legendary bakpia brands in Jogja. Each box consists of 15pcs of bakpia and costs IDR 30k. It’s very cheap and it tastes quite nice. We especially like bakpia basah (wet bakpia).
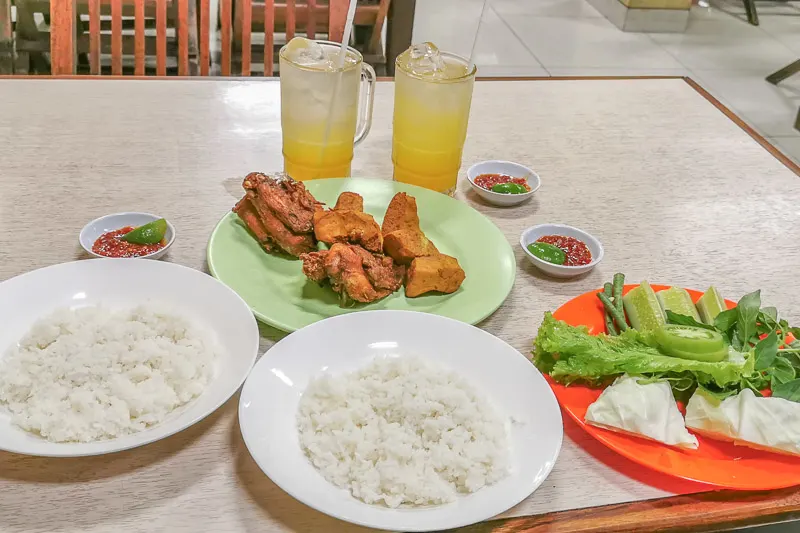
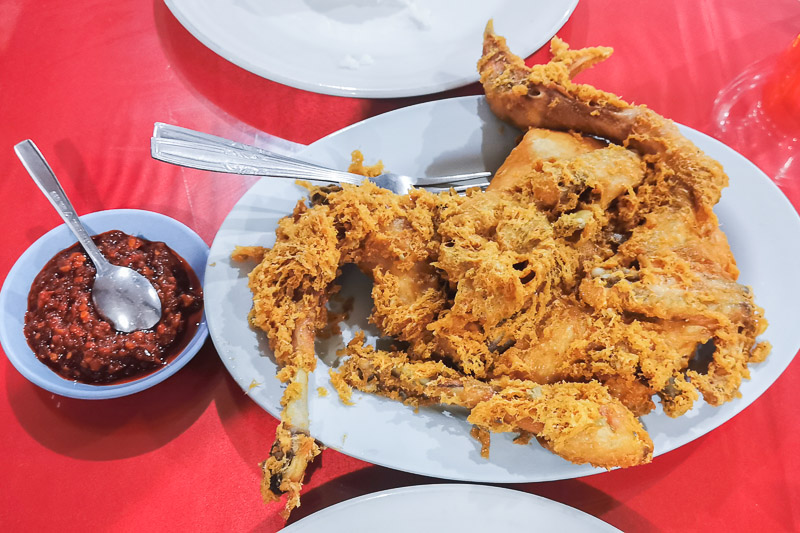
We had dinner at Ayam Goreng Suharti, another legendary fried chicken loved by locals. The fried chicken comes with crumbs which I really love. We paid IDR 156k for 1 whole chicken, 2 rice and 2 drinks. It’s a little more expensive than Tojoyo but it’s quite an enjoyable dinner and I’d gladly return.

Day 3
Day 3 started with the same boring breakfast at Atrium Hotel. We checked-out after breakfast and stored our luggage and bakpia with the receptionist.
Today, we did not have car rental because we’re planning to use Grab/Gojek to explore the city. Our first destination was Kraton. We wanted to visit the place where the royal family lives. So, we took ride-hailing to Palace of Yogyakarta.
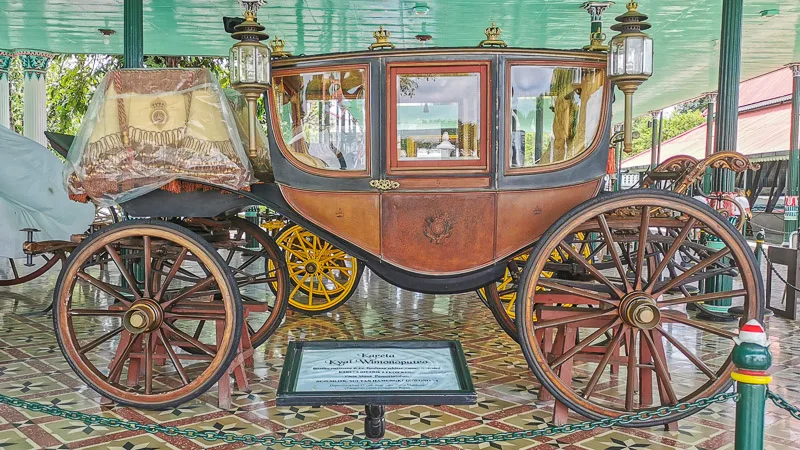
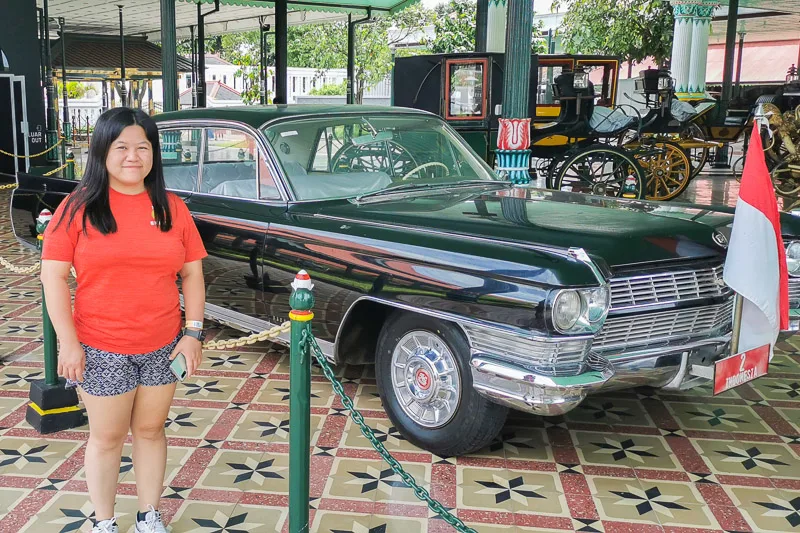
Inside the Palace, there was not much thing to see. At the yard, you can see some old horse carriages and vintage cars. Then, there’s an indoor hall displaying temporary exhibition about Sultan Hamengku Buwono III, the third king with reigned for 2 years only (1812-1814).


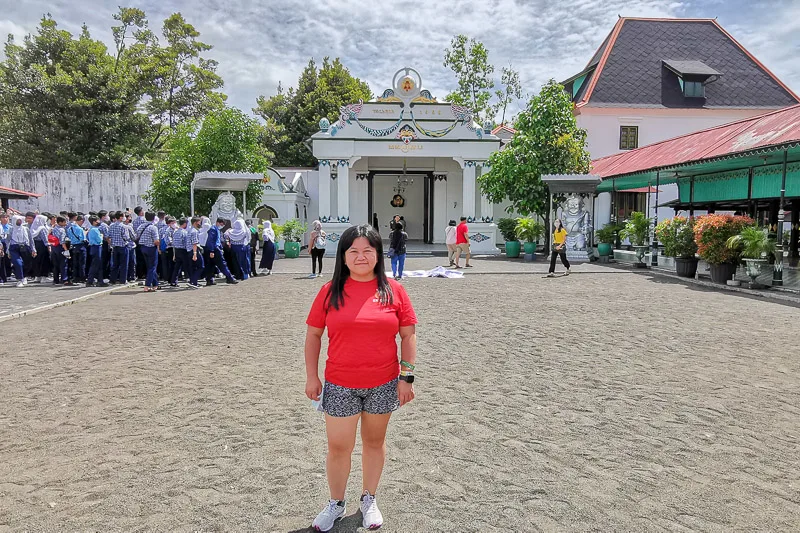
We asked around, where the real kraton is. Someone told us the direction and we finally arrived at Wisata Kraton Jogja which is just a 5-min walk through a narrow road. This, is the place you should visit.
The compound is quite huge. There are several single-storey buildings but only some of them are open to visitors. One of the exhibition is about Sultan Hamengku Buwono IV, the fourth king who took the throne between 1814 – 1823.
From Wisata Kraton Jogja, we went to Hartono Mall to look for lunch and massage. Hartono Mall is currently called Pakuwon Mall but not many people use the new name, even our taxi driver didn’t know what Pakuwon Mall is.


We had lunch at Hakata Ikkousha Ramen (IDR 80k per bowl) and massage at de WAVE (IDR 120k for 1 hour of reflexology).
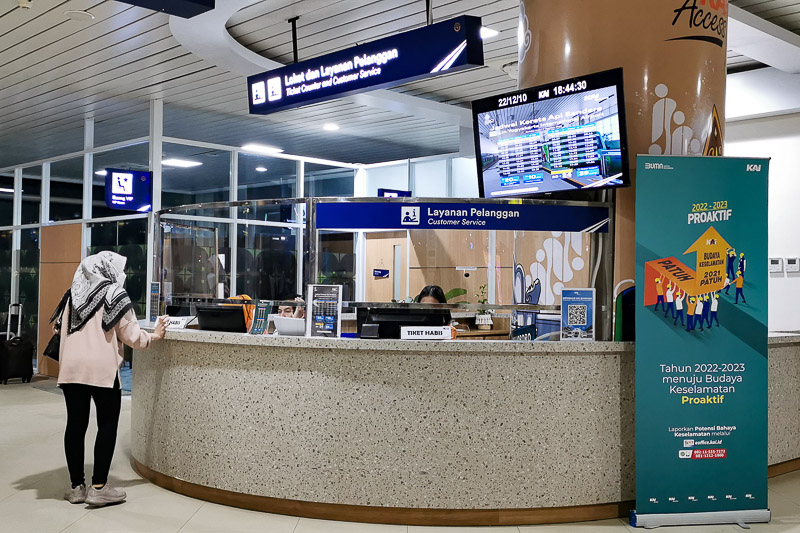
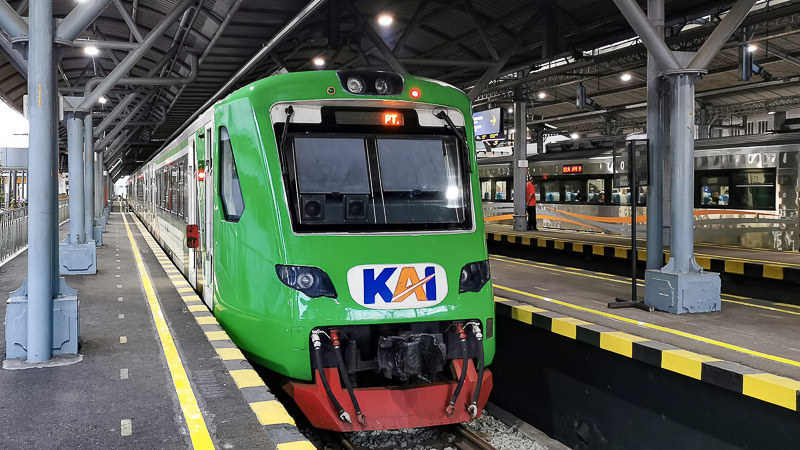
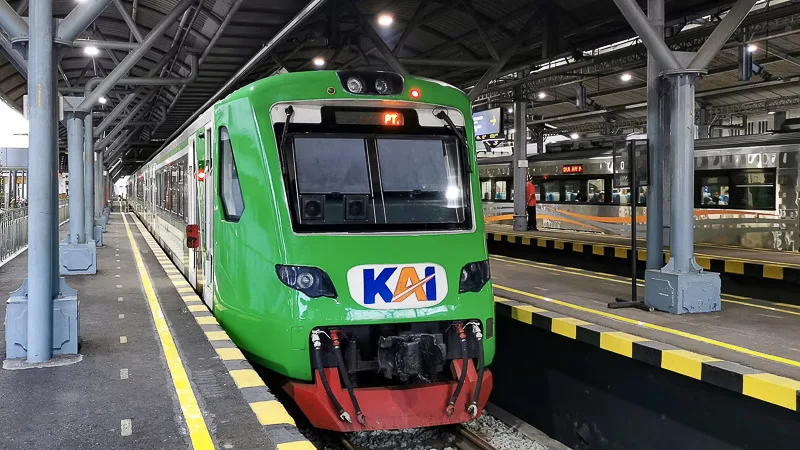
Then, we went back to hotel, collected our luggage, took cab to Tugu Train Station, and took the airport train to airport. You can read my guide on how to travel with Yogyakarta Airport Train.
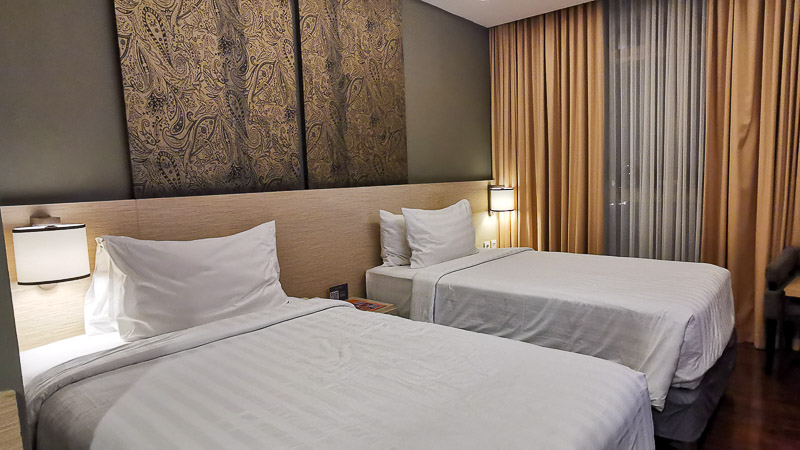
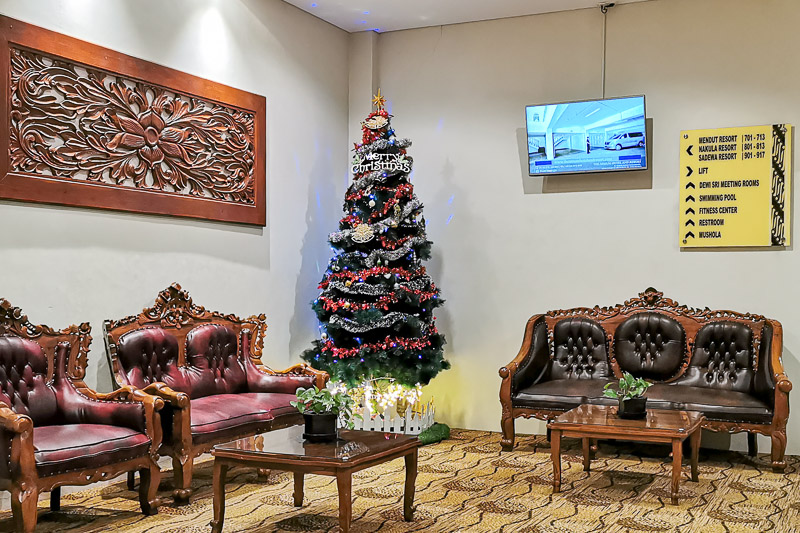
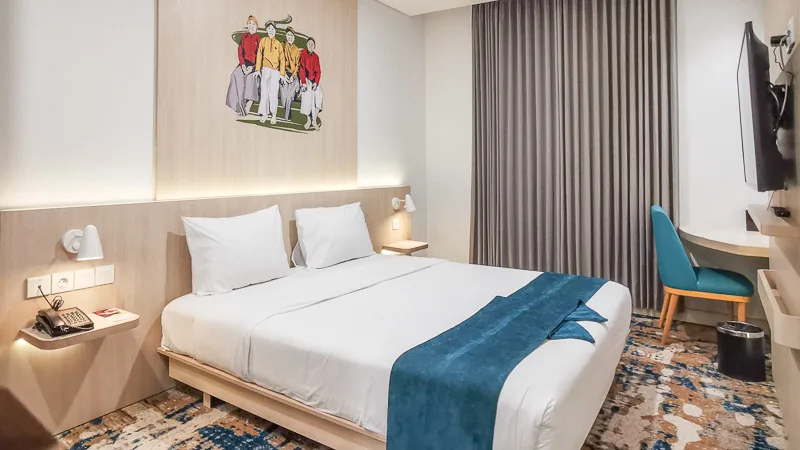
At the airport, the checked-in to Cordia Hotel, a nice airport hotel accessible from Arrival Hall. You can read my article about Cordia Hotel. After check-in, all we did were dinner, massage, shower and sleep.

Day 4
On Day 4, we had an early flight to catch at 7.45am. We didn’t have any breakfast at the hotel or airport. Instead, we had our breakfast on the flight. Whenever we fly AirAsia, I always make sure we order their in-flight meals because the meals are super affordable and taste pretty good.

And, that’s the end of my probably-too-long-winded travelogue. I hope you enjoy this diary-type of articles. If you have any questions about our trip, or any recommendation for my future trip to Yogyakarta, let me know in the comment!
If you like my work, you can buy me a coffee! Your support will help me to keep going!